Kate Lester Interiors Shares Her Bathroom Remodel
By Bedrosians Tile & Stone | 1/13/2020
This week, we're excited bring you design insights from our guest blogger and Hermosa Beach-based interior designer Kate Lester of Kate Lester Interiors. Last month, Kate revealed her master bathroom mini-facelift including tile from Bedrosians! Read below as she shares her initial thoughts on the space, why she changed a few things on the fly, what to invest in (and what NOT to) and why she kept most things budget-friendly.
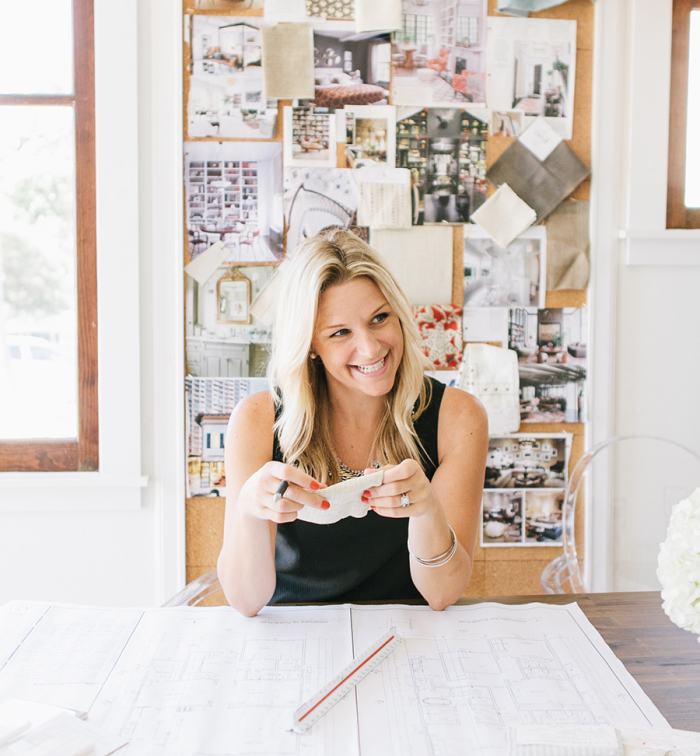 Meet Kate Lester of Kate Lester Interiors
Kate is a Los Angeles based designer,a luxury residential and commercial interior design for over 15 years.
Hi guys! I was so excited when Bedrosians asked me to share the backstory and process of my master mini-makeover. For those of you who don't know the whole story, a little over a year ago we bought an old beach shack on our dream lot about 6 blocks from the beach (woohoo!). The house, however, was built in 1951, remodeled in 1985 and it SHOWED. The minute we got the keys, I was ready to start knocking down walls! But over dinner one night my husband and I had a serious chat about our five-year plan. (If you know me, you know I am ALL ABOUT laying out a five-year plan). Would we want to tear it down and start from scratch? We were all over the place and honestly not sure. So we came to an agreement. We would allocate a "facelift" budget that I would HAVE TO stick to and this would be my "allowance" to make the house livable for the next five years. Then, we could revisit our plan and decide where to go from there. Now obviously, when I say “livable” I am using the term loosely as the house was totally livable when we bought it. I am sure most regular people could have sucked it up, saved all of their money and bit the bullet for five years. I, however, am NOT most regular people and the house made my eyes bleed in its current state. The first two spaces we tackled were the kitchen/breakfast area and my daughter's bathroom, as that also doubles as our guest bath and it was super gross. Our master bathroom was not a priority so it sat. Like. This. For about nine months!
Where This Bathroom Started
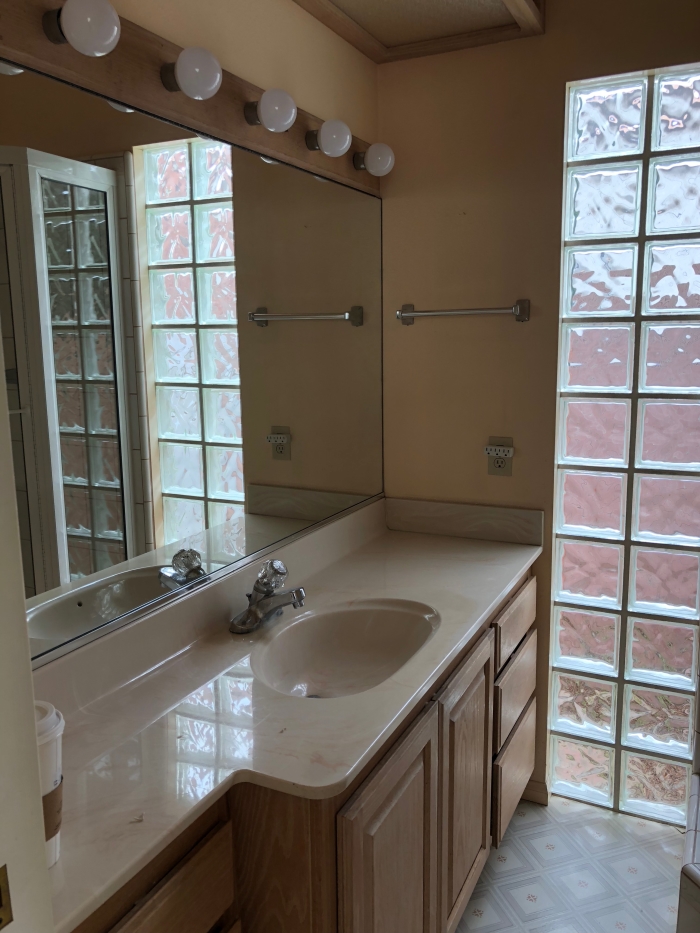 Bathroom Vanity Before
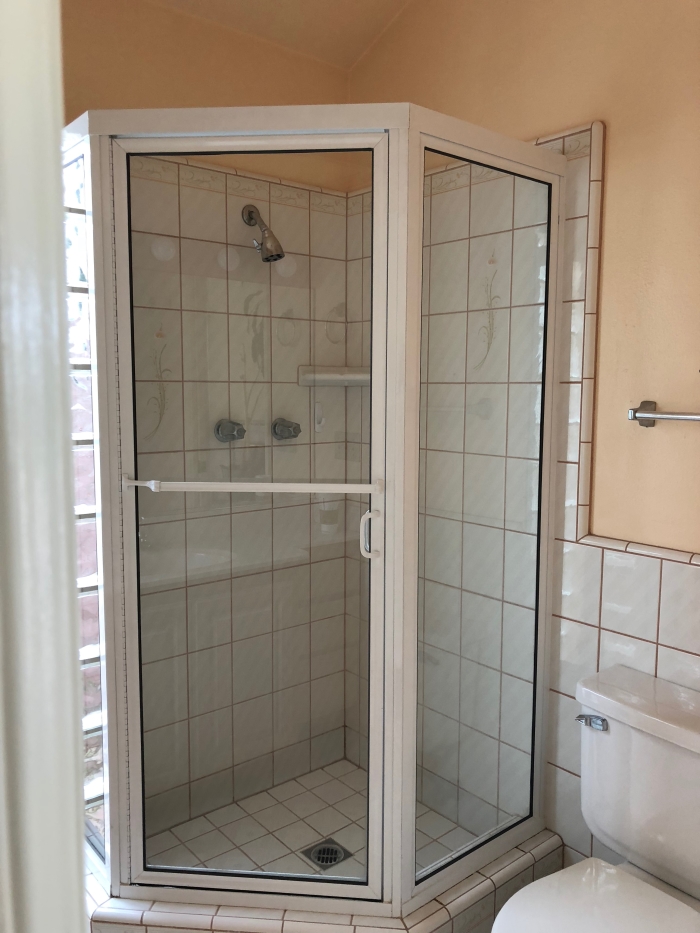 Bathroom Shower Before
The lighting was not selfie-worthy, and OMG those glass block windows are my literal worst nightmare. Not to mention the fact that this is like the tiniest bathroom ever in the history of bathrooms, so it's really hard to avert your eyes when you are in there.
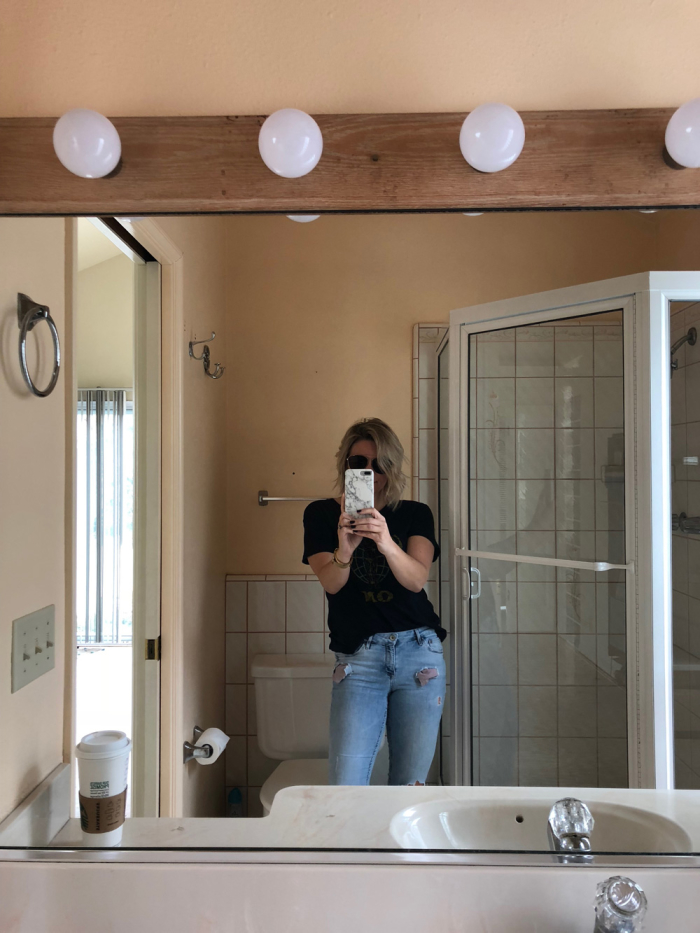 Bathroom Selfie
What This Bathroom Became
In order to convince my other half that it was worth doing (we had JUST finished all the other construction and I think he was tired of waking up to drywall dust in his coffee) I promised I would do it for $5,000 (in materials) or less. Don't believe me... follow along.
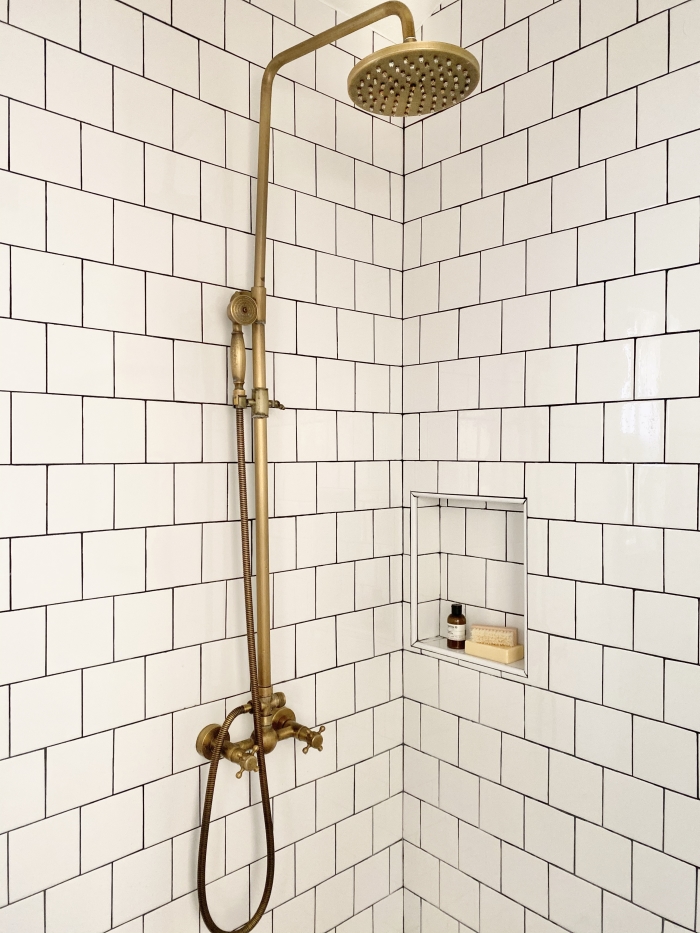 Shower after!
Let's start with the shower. I ripped out the existing tile and shower enclosure. (barf) There was not much I could do with the layout here, so I decided to keep it simple and go back to basics with a white ceramic tile like this. I opted for a square tile because it was a little more unique than a traditional subway and I laid it in an offset pattern for some added interest.

The ceilings are super high in this bathroom, so I took the tile up as high as I could to draw the eye up and make the space feel larger. This is a super-secret designer trick, so be sure to adopt it if you also have high ceilings in your shower. When it came to the grout color I had learned my lesson from our last house. We grouted our white tiled shower in white and it was BO-RING! So this time around I knew I wanted something a little more interesting. I had our tile installer do a few different dark gray grout samples against the tile, and settled on a charcoal color. If you are new to using a contrast grout pick a few you might like and do some samples. I have noticed some of the colors tend to dry darker, so it’s good to see that before you give the go-ahead for the whole shower!
 Shower walls: Traditions 6"x6" ceramic wall tile in Ice White Matte | Bathroom/shower floor: Enchante 8"x8" porcelain tile in the Moderno pattern
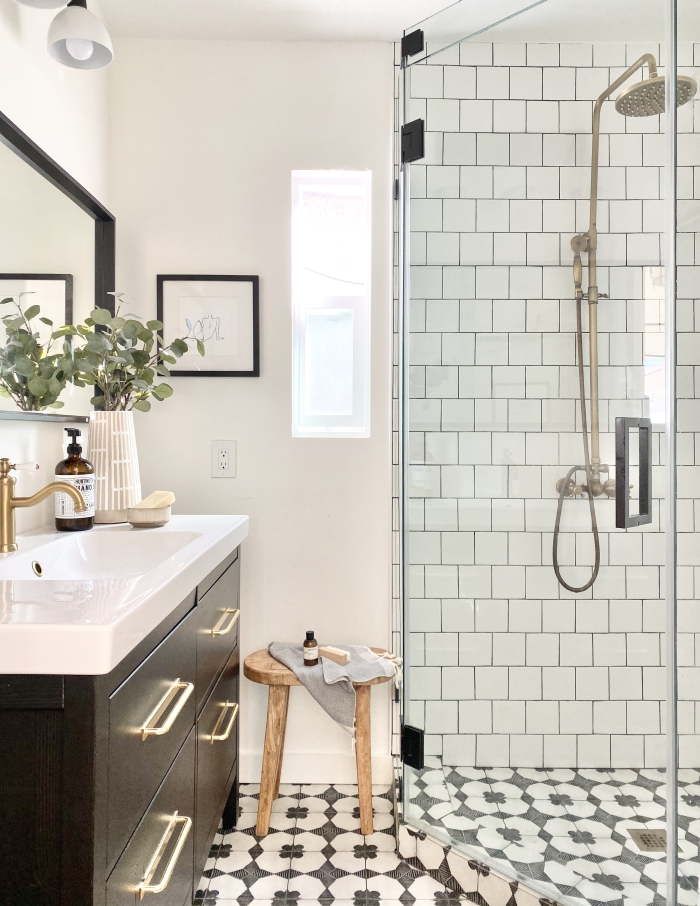
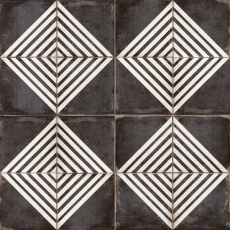
Now let’s talk about the floor. This bathroom is really small. And when I say really small, I mean like one person at a time small. I think often times when people are faced with a small bathroom they tend to want to play it safe and do everything white or light because they think it will make it feel larger and more open. That may be somewhat true, but it’s also sort of a snooze-fest. My school of thought is a little bit different. If you have a small space - embrace it! Pick a bold, funky tile and put it on the floor and go with it! I knew I wanted something fun, but also durable (and budget-friendly), so I selected the Enchante Moderno, and I LOVE it.

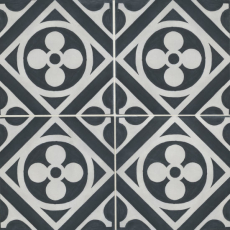
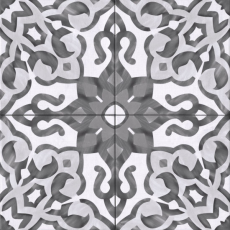
It was a tough decision because I also loved the following options and all would have also looked amazing with my shower selections.
The REAL trick to making this small space feel open with a super chic pattern floor is all about installation. Yes, installation! The key was taking the tile up and over the shower dam, and mitering the dam with the tile. I also used the same tile on the shower floor and this was intentional. It creates a visual consistency that makes the room feel larger and doesn't visually break up the space with multiple materials.
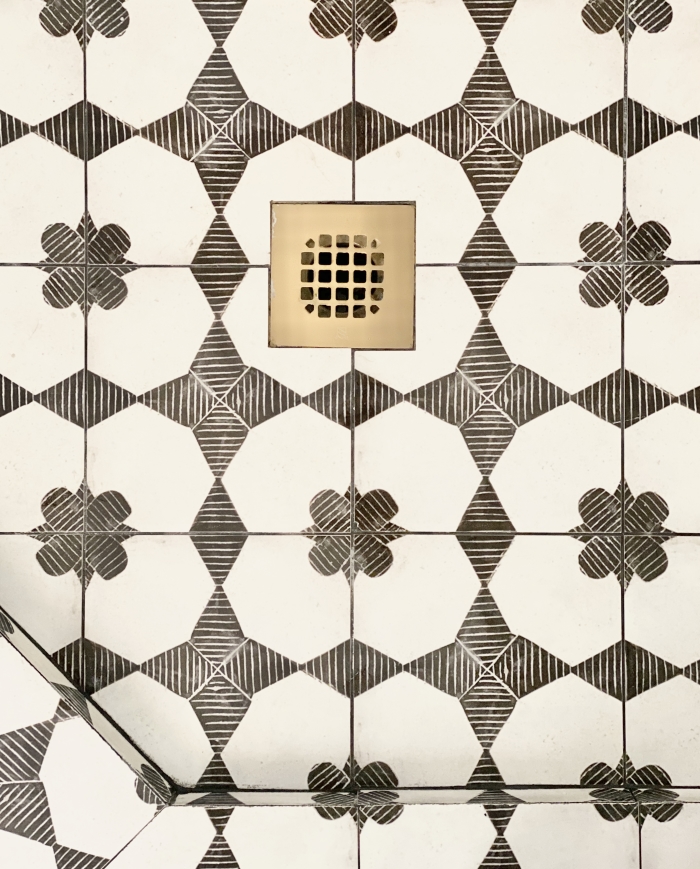 View of the shower drain tiled in Enchante 8"x8" porcelain tile in Moderno
When it came time to grout the floor I couldn’t decide between a white or a dark, but then remembered that my family are savages, and a darker grout would save my life when it came to showing dust, dirt and wear and tear, so I used the same color as I did on the walls. We’re about 7 months in, and it’s holding up great!
 View of the bathroom from my bedroom
All in all, I am pretty proud of how it came together! I stayed on budget (so I am not divorced) and it's so nice to be able to get ready in a space that doesn't make my skin crawl anymore. Even if it is pseudo-temporary, it makes me happy to have a completed space that I feel is much more in line with our overall aesthetic and vibe. (For more info on the other products I used in the space you can visit my blog.) I hope I inspired you to get to Bedrosians ASAP and get creative! It’s so easy to make some small but impactful changes that will really help you fall back in love with your own bathroom!